
Hurdle hints and answers for February 27, 2026
Hints and answers to today's Hurdle all in one place.
Hints and answers to today's Hurdle all in one place.

See the Moon phase expected for February 27, 2026 as well as when the next Full Moon is expected.

Apple has asked a federal judge to dismiss a proposed class action lawsuit accusing the company of defrauding shareholders by overstating Siri's Apple Intelligence capabilities and misrepresenting its compliance with the Epic Games App Store injunction. At WWDC in June 2024, Apple previewed two of Siri's most anticipated Apple Intelligence upgrades – personal context and onscreen awareness. The features were supposed to arrive as part of iOS 18 and were promoted the same year when launching the iPhone 16 models, but Apple is still working on them. In 2025, CEO Tim Cook acknowledged in 2025 that developing a "more personal" Siri was "taking a bit longer than we thought." The delay led Apple to be accused in a March 2025 lawsuit of false advertising and unfair competition. But in a Wednesday filing in San Jose federal court covered by Reuters , Apple argued there is no proof executives knew at the time that either feature would be significantly delayed. Apple's motion also pushed back on separate claims related to the Epic Games injunction , which required the company to let developers link users to external purchase options outside the App Store's 30 percent commission structure. Judge Yvonne Gonzalez Rogers found Apple in "willful violation" of that injunction last year after the company introduced a new system that still charged developers a 27 percent fee on some external sales. A federal appeals court partially reversed her sanctions in December. Apple said it never guaranteed its compliance procedures would be foolproof, and argued the fraud claims were unsubstantiated. "It is no secret that Apple faced challenges and weathered ups and downs in its stock price in 2025, like many major companies," Apple said. "But plaintiff takes a massive and unsupported leap by claiming that securities fraud caused the temporary price drops." The lawsuit covers shareholders who suffered losses between May 2024 and May 2025 and is led by South Korea's National Pension Service, the world's third-largest pension fund. Lawyers for the shareholders have not yet responded publicly to Apple's filing. Tags: Apple Intelligence , Epic Games vs. Apple , Apple Lawsuits This article, " Apple Asks Judge to Toss Fraud Claims Over Siri AI, Epic Compliance " first appeared on MacRumors.com Discuss this article in our forums

Recent extreme freezing temperatures unseen for over a century in Florida resulted in live, cold-stunned green iguanas literally dropping from trees.

Takashi Mochizuki / Bloomberg : The Japanese government plans to invest ~$1.6B in Rapidus over the next two fiscal years to help it mass-produce 2nm logic chips and potentially challenge TSMC — The Japanese government will invest a total of ¥250 billion ($1.6 billion) in state-backed Rapidus Corp. as part …

Nothing will pull back the curtain on Headphone (a) in a "Built Different" event on March 5.
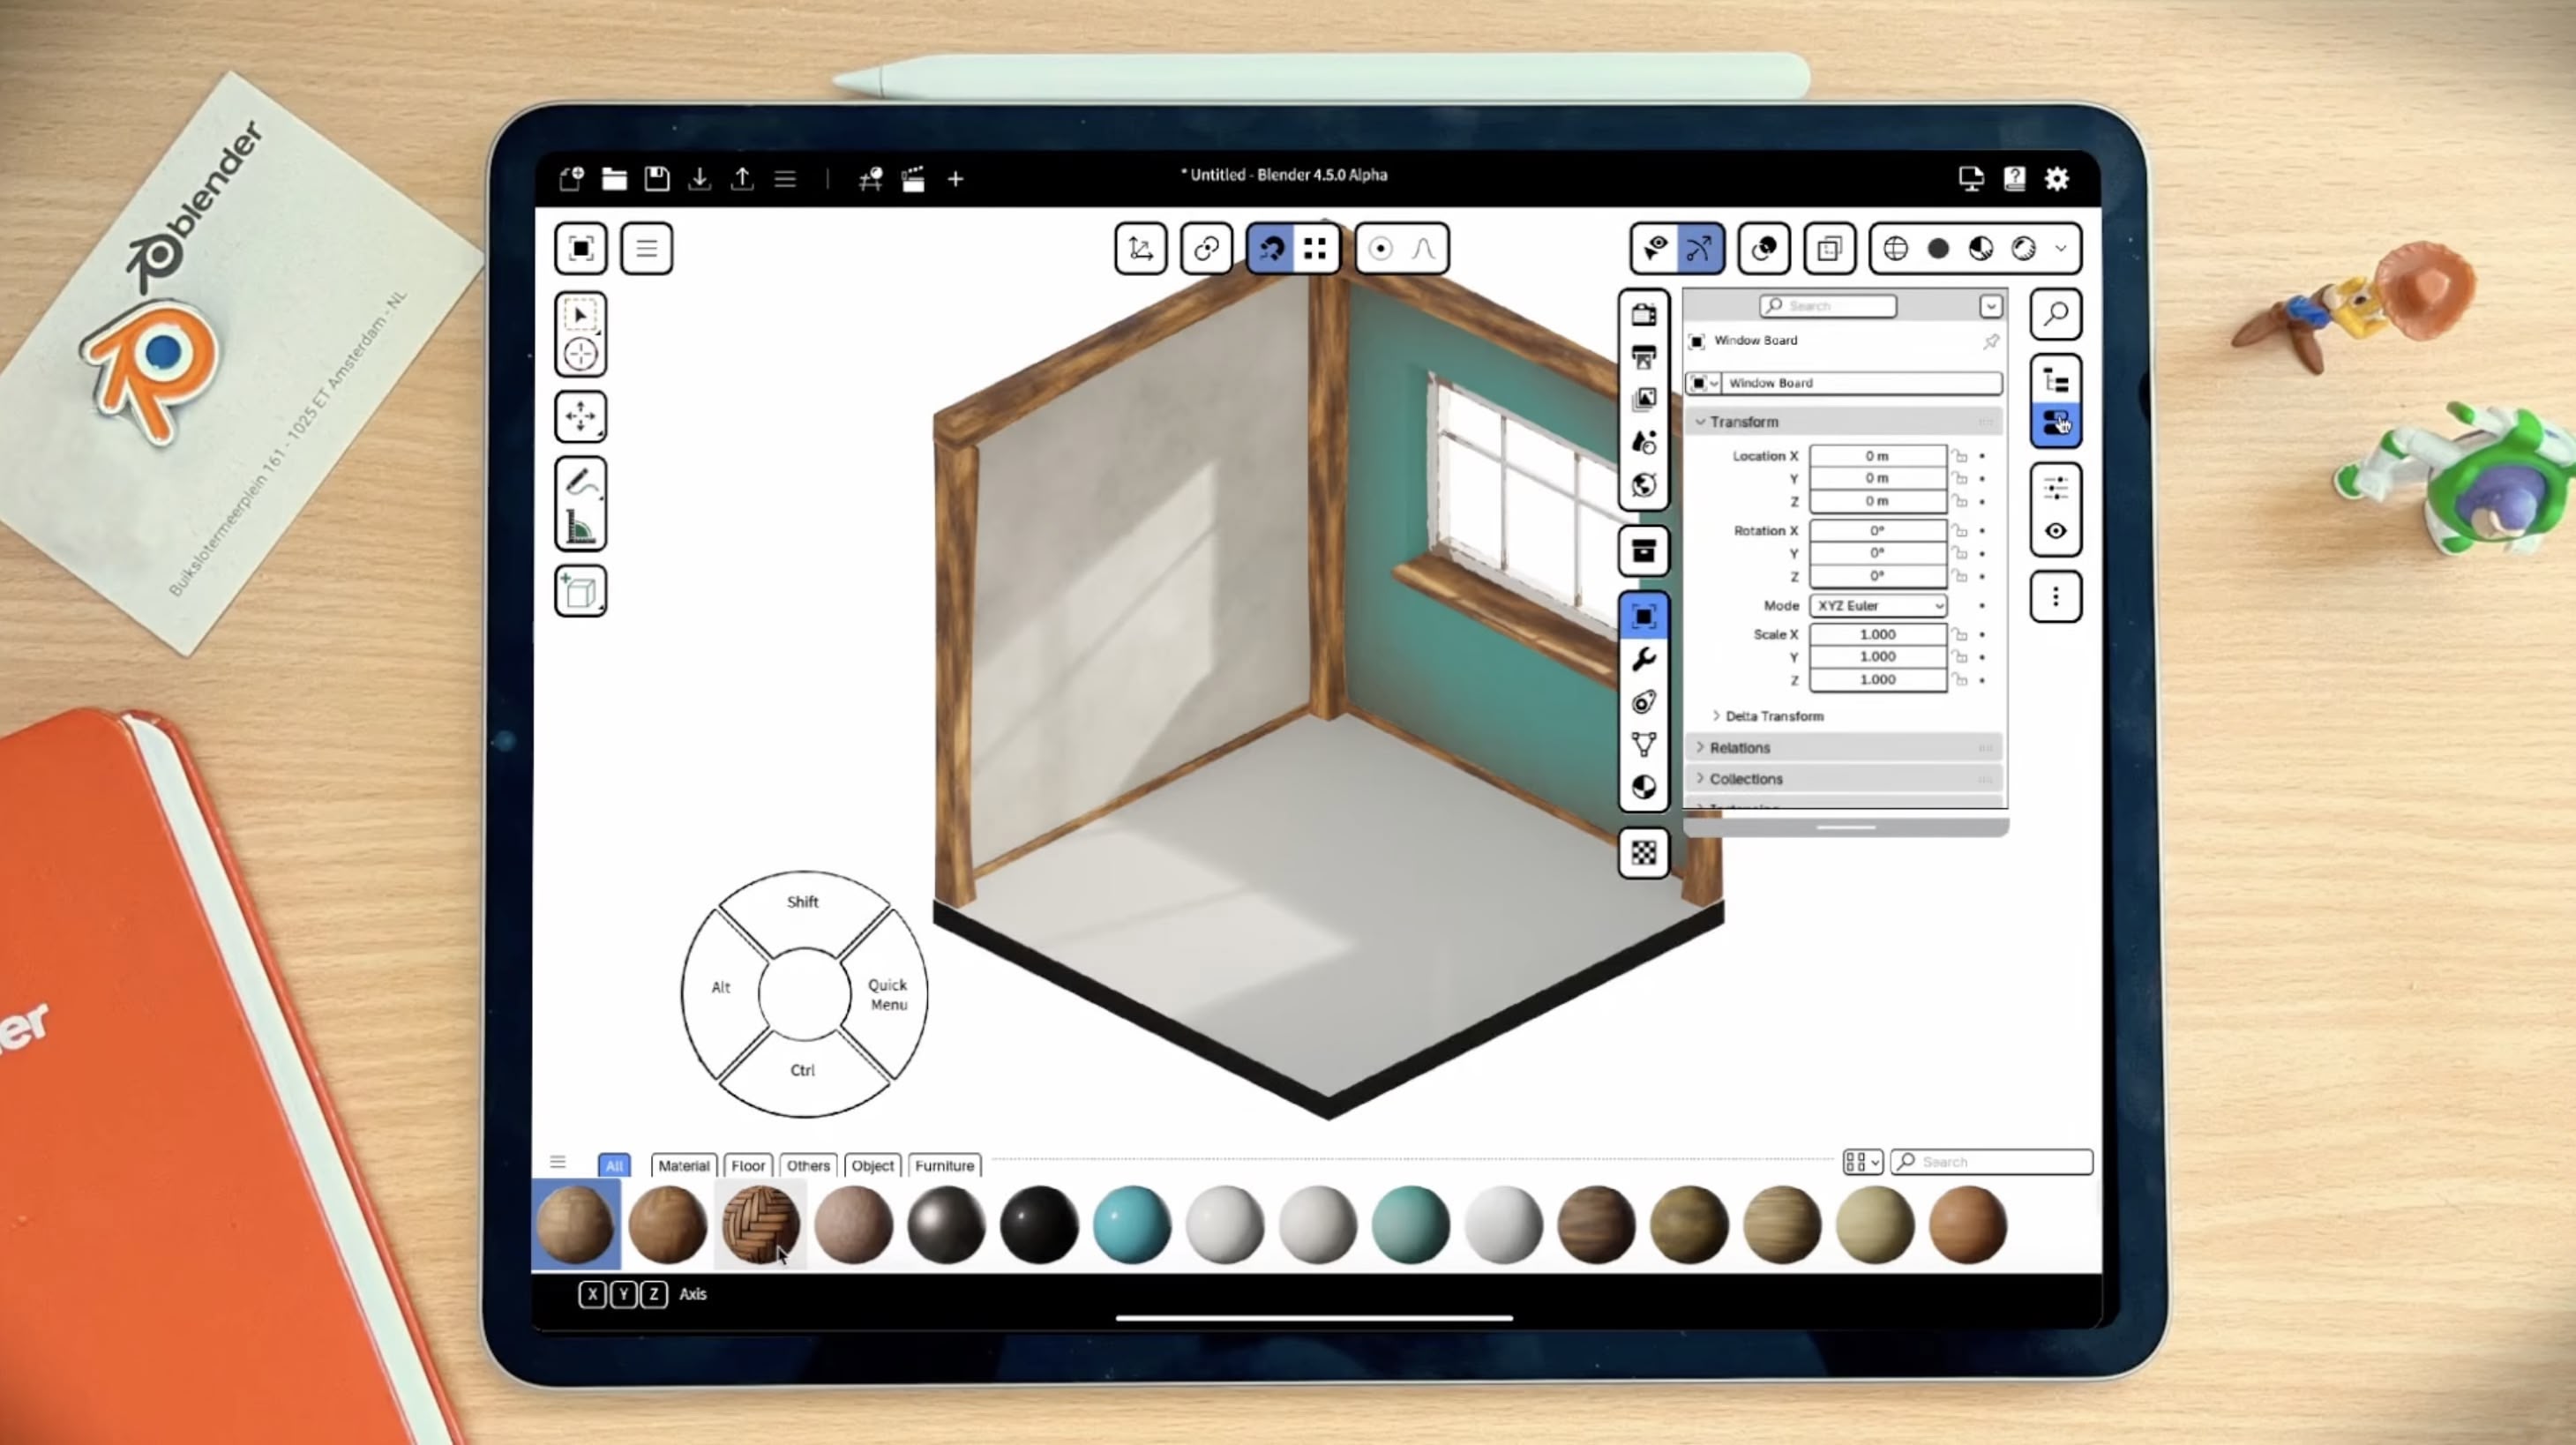
Blender 's work on a native iPad version of its open source 3D creation suite has been shelved, according to the development team. Back in July, Blender revealed that it was developing for iPad, with an iPad Pro version of its desktop software coming first, complete with a fully-featured multitouch interface and support for Apple Pencil Pro. No release date was announced at the time. Now it doesn't look like that's about to happen anytime soon. In January, a status update appeared on Blender's GitHub page for iPad development saying that the project is on hold until further notice. No reason for the halt in development was given in the notice. However, as spotted by YouTuber Brad Colbow , in a response to a comment offering help on the project, Blender developer Dalai Felinto said that the team was now focusing on Android tablets first instead. During the fall at SIGGRAPH in Vancouver, Blender showed a live tech demo of the software running on iPad, so there's still hope that the project isn't completely dead and will resume at some point. We'll update this story if we learn anything more about a development timeline. The latest Blender build for Apple silicon Macs can be downloaded for free from the Blender website . Tag: Blender This article, " Blender iPad App Development Halted as Android Tablets Get Priority " first appeared on MacRumors.com Discuss this article in our forums

Tripp Mickle / New York Times : Letter: 100+ Google DeepMind and other AI employees urge Jeff Dean to block US military deals that use Gemini for mass surveillance or autonomous weapons — More than 100 Google A.I. employees sent a letter to Jeff Dean, a chief scientist, opposing Gemini's use for U.S. surveillance and some autonomous weapons.

Cardiovascular and heart disease is already the leading cause of death for women in the United States.

Nintendo Co. plans to trim strategic shareholdings worth about ¥300 billion ($1.9 billion) owned by its partner banks, Reuters reported, citing three people familiar with the matter.
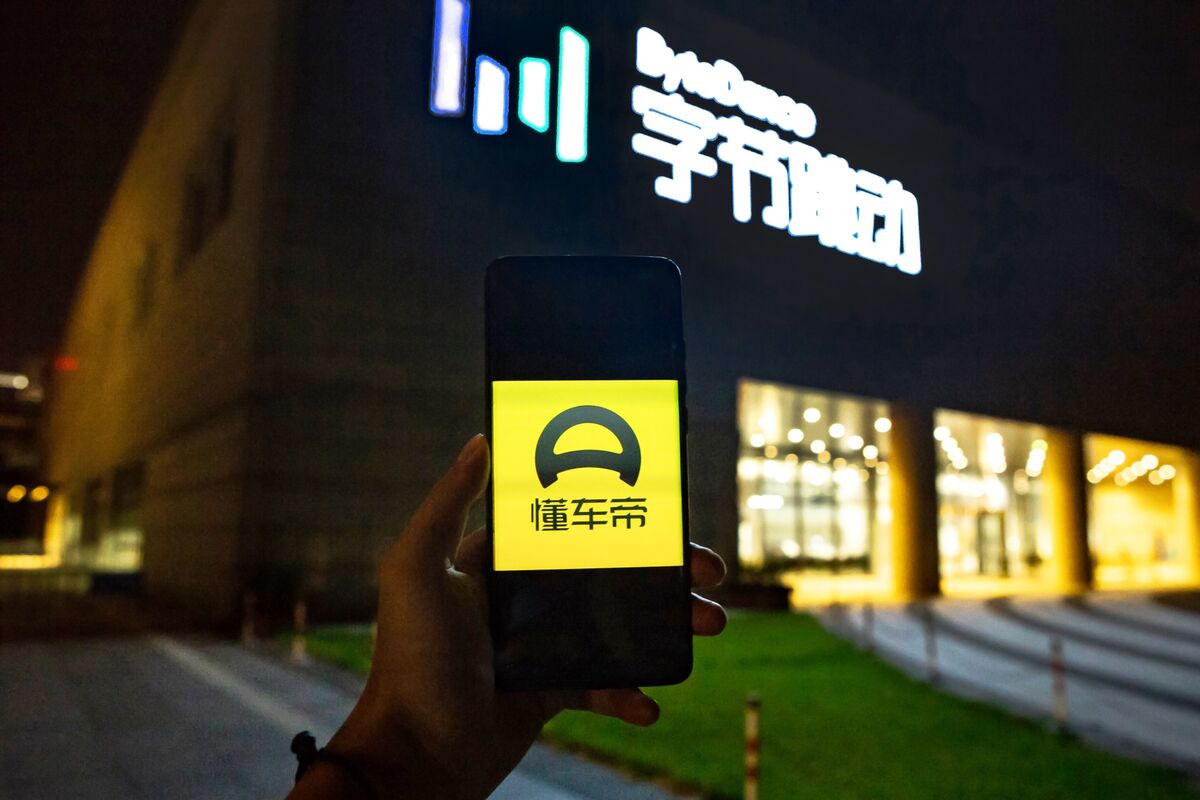
Beijing Dongchedi Technology Co., an automotive information and trading platform known as DCar, is considering an initial public offering in Hong Kong as soon as this year, according to people familiar with the situation.

Luke Barr / ABC News : CISA's interim director Madhu Gottumukkala is reassigned as DHS' director of strategic implementation; executive assistant director Nick Andersen will take over — The nominee to serve as CISA director has not yet received a hearing. — The Department of Homeland Security (DHS) …

Tamsin McMahon / Bloomberg : xAI co-founder Toby Pohlen is leaving the company, the seventh of 12 xAI co-founders to depart; Elon Musk put Pohlen in charge of Macrohard earlier this month — xAI co-founder Toby Pohlen said he is leaving Elon Musk's artificial intelligence startup, the latest founding executive to depart …

Mickey Djuric / Politico : OpenAI says it will overhaul safety protocols and establish direct contact with Canadian police, after not alerting authorities about the Tumbler Ridge suspect — Following meetings with the governments of Canada and British Columbia this week, OpenAI says it is committed “to help prevent tragedies like this in the future.”

More than two years after its first season wrapped, Apple TV has finally premiered the long-awaited return of Monarch: Legacy of Monsters . Here’s what to expect. more…

These Netflix drama shows are worth binge-watching, making them perfect choices for a lazy weekend.